Translate


Every artist who has used a render farm knows the feeling. The scene renders perfectly at the office, you submit it, you step away to make a coffee — and you come back to a job that failed on the first frame because of a texture nobody has thought about since 2019.
Cloud rendering itself has become straightforward. Preparing the scene for it is the part that still catches people out.
Why scenes arrive incomplete
A typical archviz scene is assembled from a dozen different places: models bought from various stores, textures downloaded over several years, HDRIs kept on an external drive, proxies borrowed from an older project, and the odd asset that came from a colleague’s machine.
By the time the scene is finished, its asset links tell a complicated story:
- Absolute paths pointing at drives that exist only on your workstation
- Missing textures left behind when a library was reorganised
- xRef scenes with their own dependencies, nested several levels deep
- Duplicate assets — the same texture in four folders, under three names
None of this necessarily stops the scene rendering locally because your workstation can still resolve most of those paths.
The problem appears when the project has to leave that workstation and every dependency needs to be found and collected reliably.
Why preflight checking saves time
RebusFarm’s Farminizer includes SmartCheck, which scans the scene before upload and reports missing textures in the messages window.
It is a useful final safeguard before rendering. The advantage of checking earlier is that you still have time to fix the problems — and, when several scenes are involved, to fix them in batch rather than one file at a time.
It makes far more sense to catch and repair these asset problems in advance — across every file at once, before the submission workflow even begins.
Checking and repairing links in batch mode
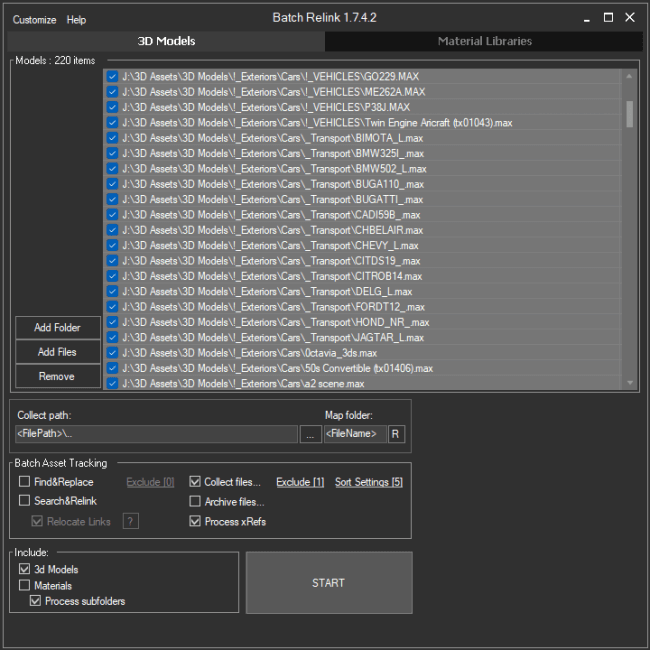
Project Manager includes the Batch Render&Relink utility for exactly this.
The same work can be done with Batch Relink 3D Files, a standalone Windows application that does not require 3ds Max to be installed — so it runs on any machine, even while 3ds Max is busy rendering something else.
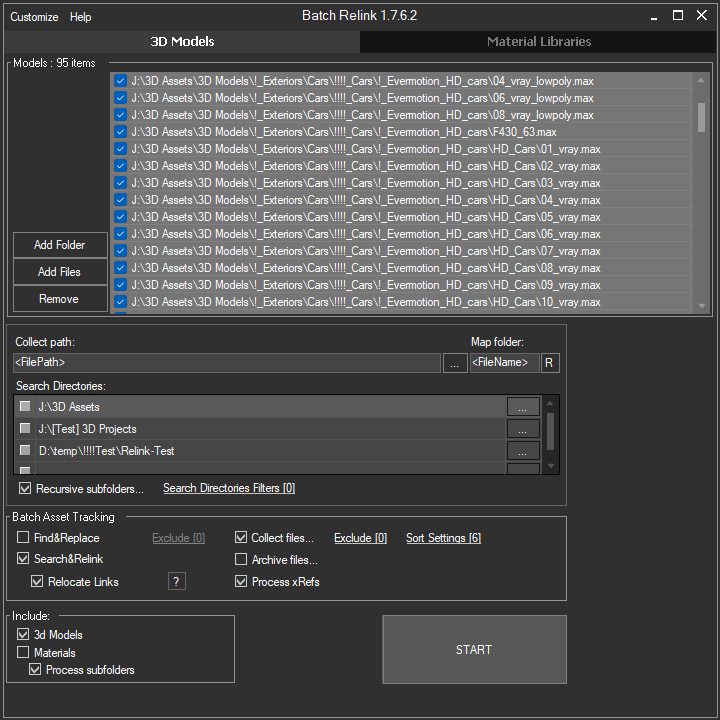
The process looks like this:
- Add the files or folders containing your scenes
- Enable Batch Asset Tracking to gather every asset reference
- Enable Search&Relink and point it at your library folders — missing files are located by name and the paths are reassigned automatically
- Enable Process xRefs so nested scenes are handled together with their parent
- Press START
The important word here is batch. It is not one scene at a time, but as many files as you add: an entire folder, several folders, a whole project together with its material libraries. Thirty animation scenes are checked and repaired in a single run while you get on with something else.
Every asset type is covered: bitmaps, IES files, proxies, xRef scenes and material libraries.
Even a format as specific as an IFL file is handled — the references to the individual frames of a sequence live inside a plain text list rather than in the scene itself, so most tools simply never see them, which makes them particularly easy to overlook when an animation project is moved or submitted for rendering.
See also our FAQ: How to Archive 3Ds Max files and Material Libraries with Assets in the Batch mode.
When you need to archive
If you are submitting from the same machine the scene was built on, repaired links are all you need.
Open the file in 3ds Max and send it through the Farminizer — it collects the assets itself.
Archiving is for the other case: when the project has to travel. Handing a scene to a colleague, passing it to a freelancer, sending it to another studio, or putting it into backup.
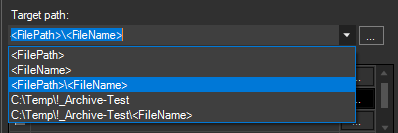
Enable the Archive files option and each scene is packed together with all of its assets.
The detail that matters: links inside the archive are stored using relative paths.
Unpack it on any other computer and every link still resolves because nothing depends on your original drive letters.
Submitting
Now open the scene in 3ds Max and bring up the RebusFarm setup window.
With the asset paths already checked and repaired, SmartCheck becomes the final confirmation rather than the place where problems first appear.
Preparing a scene properly takes a few minutes. Discovering the problem after the render has started takes considerably longer — and the deadline rarely moves to accommodate it.
Less time organising, more time for creativity.