Translate


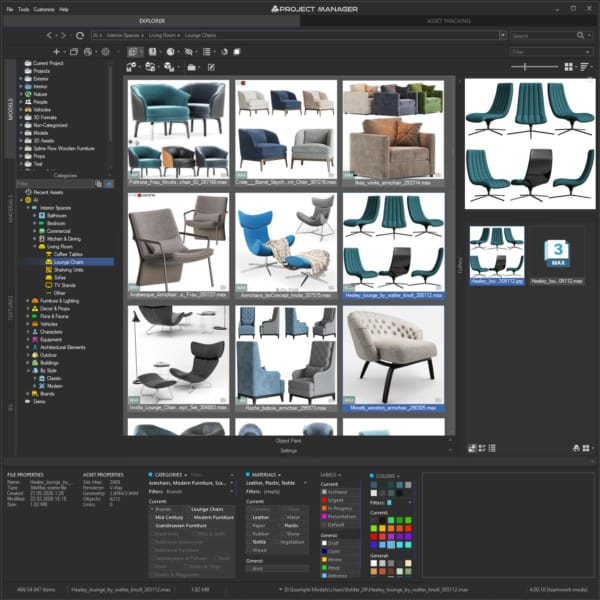
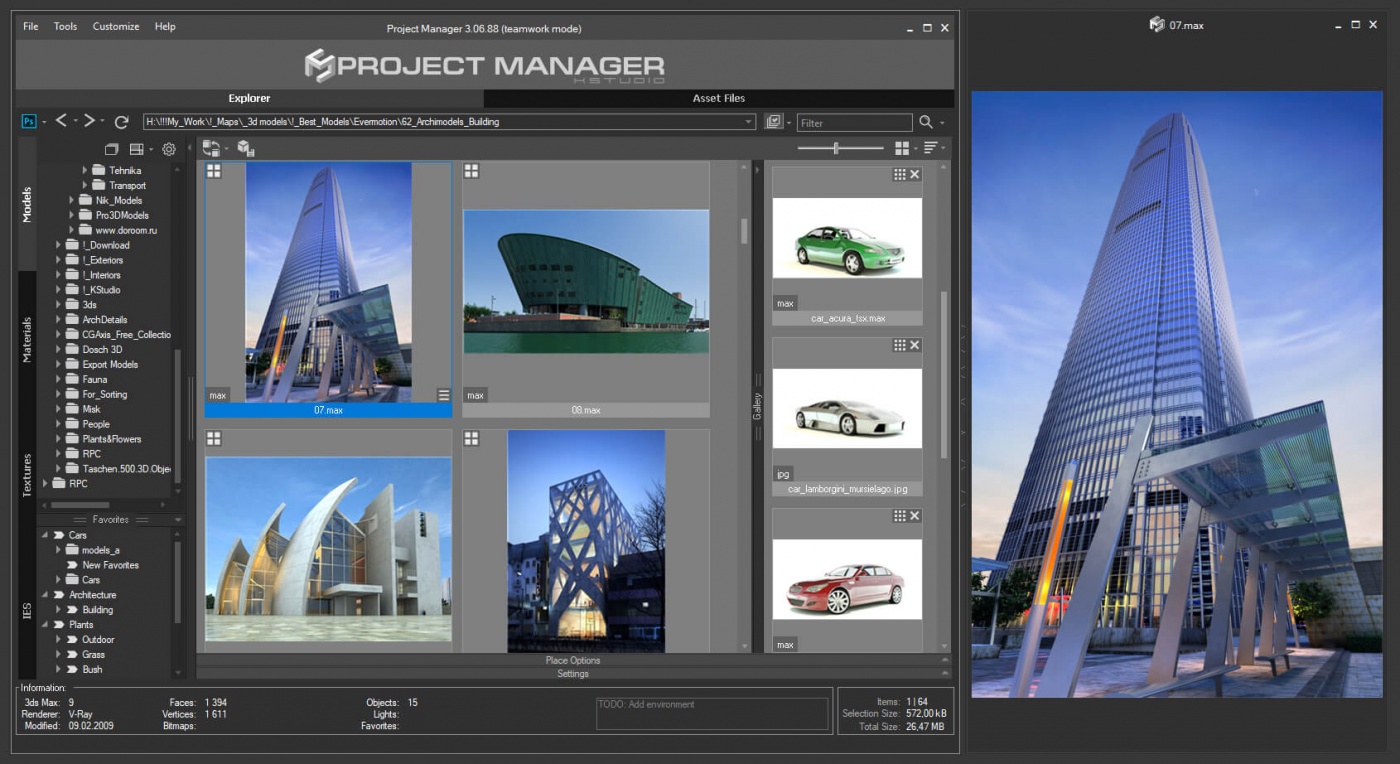
We’re pleased to announce the release of the Project Manager 3 for 3ds Max!
Perhaps, its most unique feature – there is the ability to assign custom previews to materials, associate files with materials, and create a gallery of files associated with any type of assets including materials. You can also write a description for material and, of course, add materials to favorites.
Working with files
Files Gallery
The possibility to attach files to any type of asset, creating linked galleries.
Materials are also supported.
The first image in the gallery is used as a preview for the file.
Use “drag & drop” to change the file position in the gallery.
When rendering a preview from Project Manager or Batch Render & Relink, images are automatically added to the gallery of the file.
Also, a proxy file that created when you merge the model is automatically added to the gallery.
You can associate multiple proxy files with one model file. Below you can find the information about path settings for proxy.
You can drag assets directly from the gallery to the viewport.
Now any types of assets, including materials, support the gallery, can be added to favorites and contain a description.
The ability to search for materials will be implemented in one of the next versions.
* These new possibilities for materials are in the test mode and can be changed in the future
For proxies, you can use a custom path – relative or custom.
<FilePath><FileName> – Create/Reuse proxy from Model’s directory
<ProjectFolder><FileName> – Create/Reuse proxy from active project directory
<Proxies><FileName> – Create/Reuse proxy from active proxies directory (specified in 3ds max settings )
<Scene><FileName> – Create/Reuse proxy from active scene’s directory (also specified in 3ds max settings )
Also, a customer can specify custom path like “C:\Project\ANY_CUSTOM_PREFIX\_<FileName>” or “<Proxies>CUSTOM_FOLDER<FileName>”
Address box gains advanced navigation capabilities like Windows Explorer.
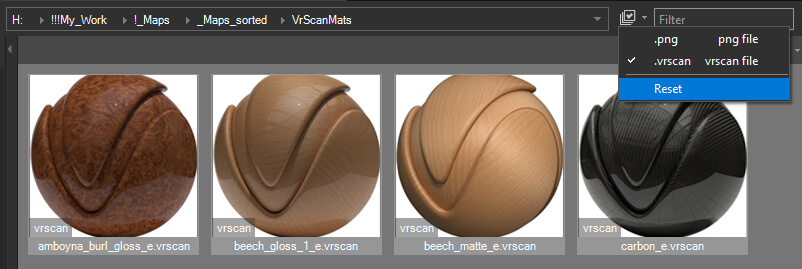
Filter Textures
For the texture section, the filter by file type is saved for each folder.
For example, this is convenient, when working with parametric shader files, such as VrayScan, OSL, etc. That is, you can disable the display of PNG files in specific directories, and this choice will be remembered and used only for the specified folders.
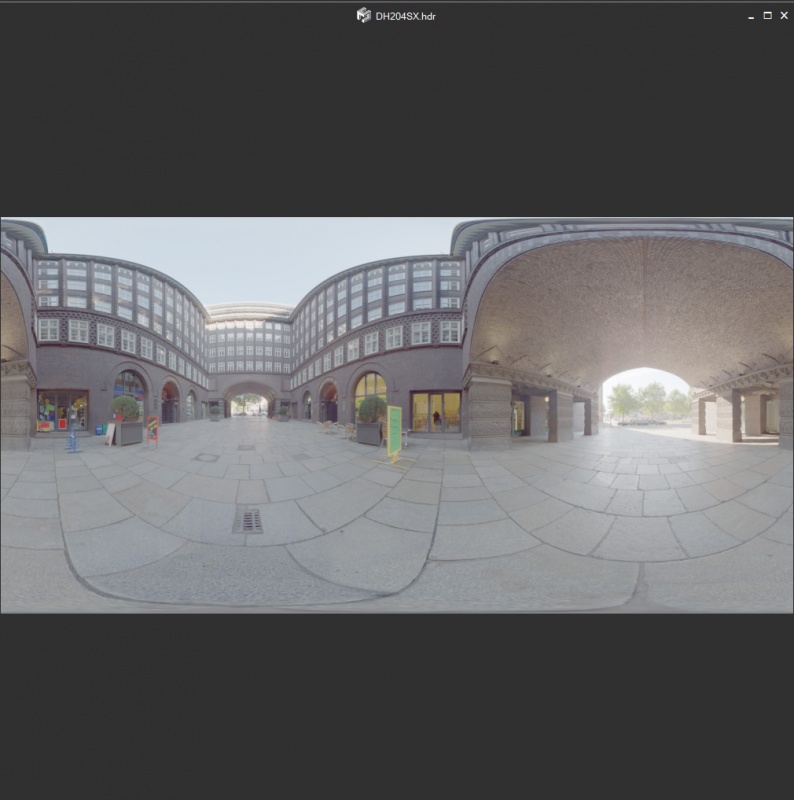
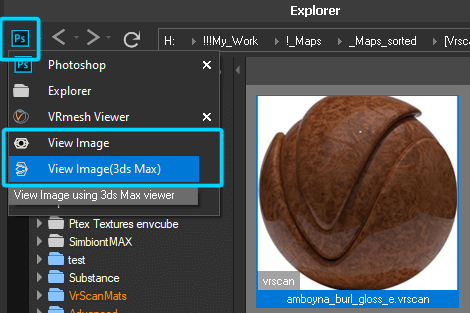
View 3D Files
Now you can view any type of asset in a separate window. Whether is it an image, an HDRI file, a 3D FBX file, 3DS, BVH or IES file – any of these files you can view in high resolution in a separate window. The file in the window is updated when you change the file selection in the list. You can also save the selected view for a 3D file into the file’s gallery.
To opening a file in a separate window, find a related option on the menu or use the SPACEBAR key.
Advanced Asset Renamer
This is a feature that users have been dreaming of for a while: renaming several files by mask at once.
Now you can configure and rename selected files by mask in a couple of clicks using the method that is most convenient for you.
The same dialog is available on the “Asset Files” tab for scene links.
Find it in the menu “Tools” => “Mass Rename”.
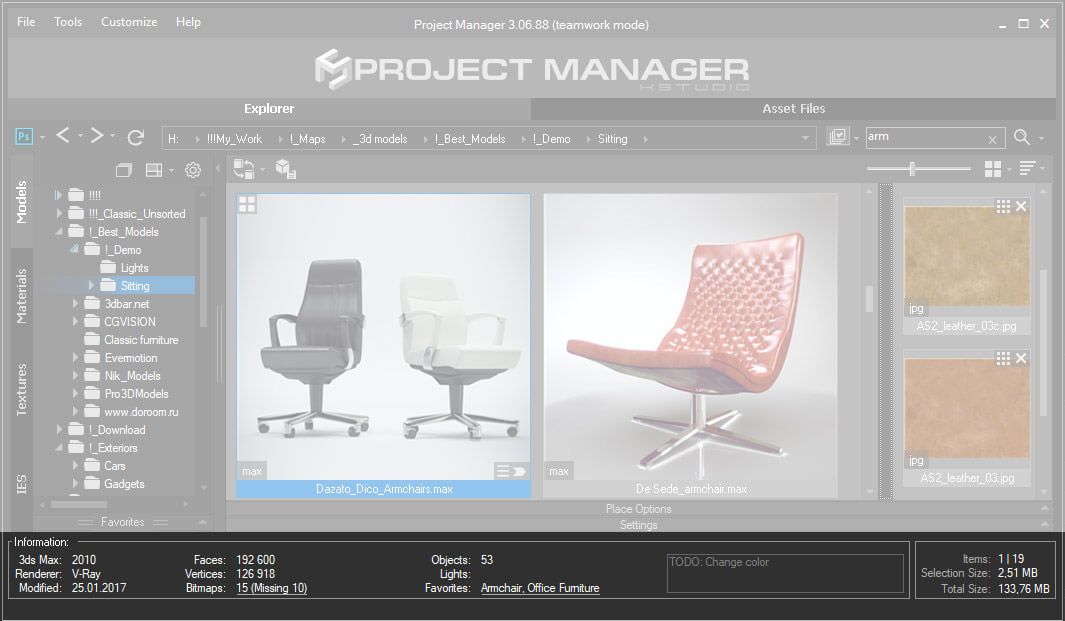
Status Bar
The information about the selected asset can be viewed in the status bar at the bottom of the utility.
For each type of asset, the relevant information is displayed – resolution and bit rate for images, data on the number of faces, vertices and objects for 3D models, etc.
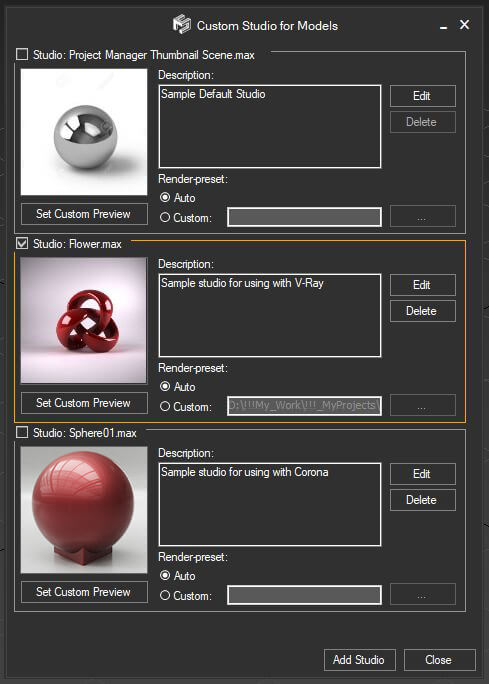
Batch Rendering: Custom studios for rendering
Now you can create a set of custom studio presets for rendering previews and switching between them. The management of studios for renderings has become easier and more convenient.
Add any number of studios and switch between them in one click.
You can also switch between render studios directly during batch rendering
using the Project Manager API.
For each studio, you can leave a comment, assign previews and reassign render-preset.
Working with Directories
The content of the opened folder is updated automatically when files are changed outside the Project Manager. The plugin also supports the interactive synchronization of the folder tree when working in the team-mode.
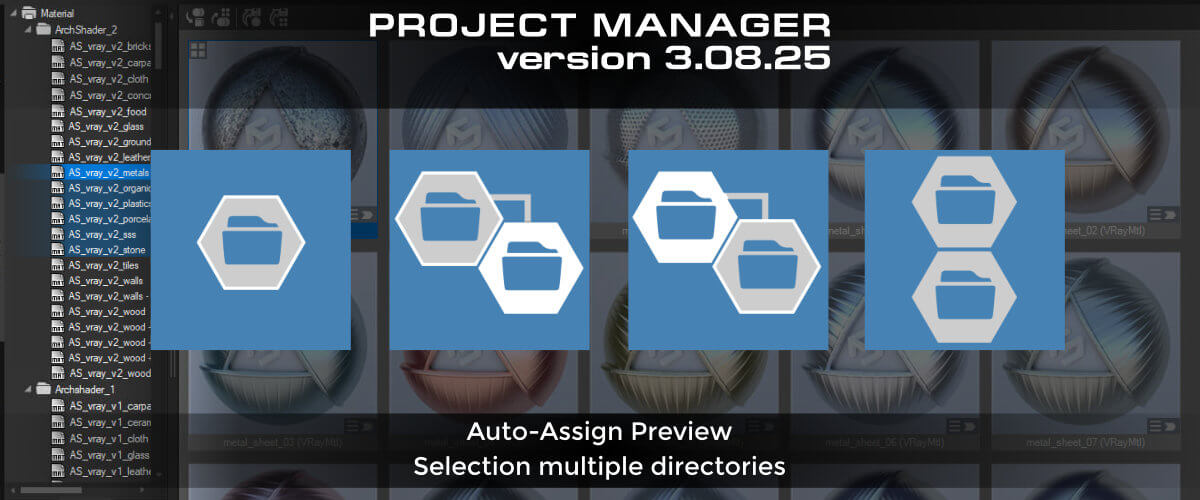
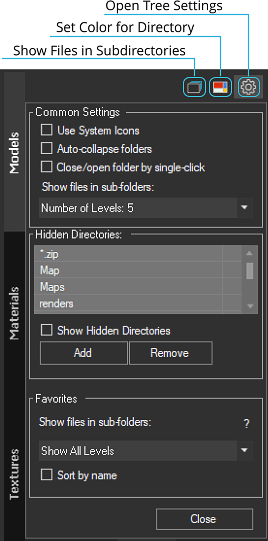
Customer can select several folders at once using SHIFT or CTRL, and specify the color for them or enable the display of files in subfolders.
In the future, the functionality of working with several selected folders will be expanded.
Also, customers can exclude folders by specifying the full path, by mask using the * character or only by folder name (for example, do not show the” Maps” folder for the “Models” category).
These settings are individual for each user, and during teamwork, a user can hide any folder, but at the same time, all folders will continue to synchronize for the entire team.
You can always change the display settings for these folders in the menu located above the folder tree.
Moving to the new version
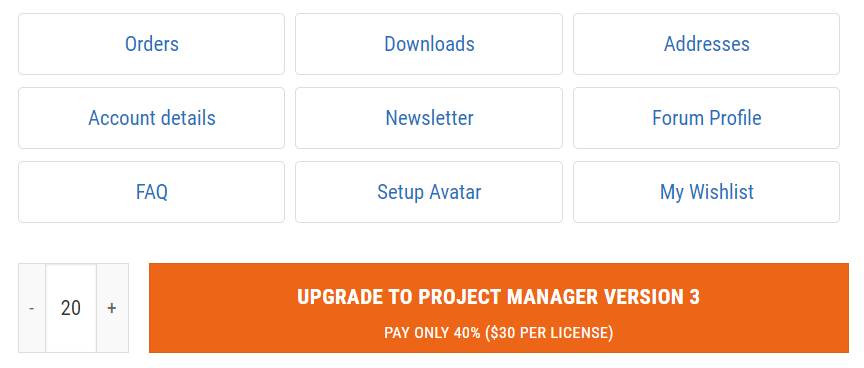
Cost of upgrading to the 3rd version is only $30 per license.
The offer is valid until December 1st.
After upgrading download the 3rd version, generate new id files and update your license keys.
When installing the 3rd version, a new database is created and the data is copied from the existing one.
In this way, you can upgrade to a new database, but at the same time, if you use a common database with your team, your team will be able to use the previous version of the database. Thus, you can deploy a new version gradually, transferring your team to use the new version step by step.
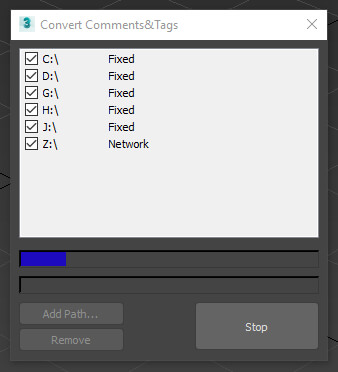
Comments on files and materials are now stored in the database.
To transfer comments and tags for 3D models to the new version, use the “Convert Descriptions & Tags” submenu in the “Project Manager” menu.
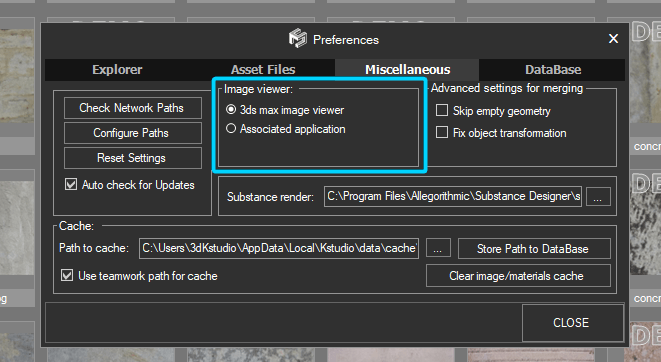
The option for choosing the default viewer for images in the associated application is moved to Project Manager menu above the address bar.
>>
$60.00Add to Cart
TreeView
- Move Favorites to separate panel
- Now Favorites can contain any type of assets including materials
- Material libraries can be stored in virtual directories such as Catalogs and Favorites
- Customer can hide directories from tree-view by a full path, by name or mask using the symbol “*”
- Ability to select multiple directories *
- Ability to specify the Color for folders
ListView
- Auto-update opened directory when changing files outside Project Manager.
- Interactive synchronization of the folder tree when working in team mode.
Gallery
- Ability to link files with each other (just drag and drop file(s) onto an item **)
- Ability to set your own previews to the items (drag the preview onto an item and set it as first in the gallery ***)
- Drag&Drop items to 3ds Max directly from Gallery
Materials
- Ability to link multiple different files with materials
- Ability to store materials in the favorites
- Supports to comments
Batch Rendering
- Setup multiple custom studios for rendering 3d models and material libraries
- Rendered images are automatically added to Gallery.
Status bar
- Display additional information about a selected file in the status bar
- Now you can open the asset management form for max files and material libraries directly from the status bar
- Ability to delete the file from the categories directly from the status bar
Proxy
- Customers can specify a path to Proxy. He can be full or relative. (see Preferences dialog )
- Files that are converted to Proxy now automatically linked to a source file and added to his gallery
Miscellaneous
- ArchVision RPC animation preview
- Play animation preview for video files
- Ability to store file-type filters for directories in the “Textures” category
- “HDRI” category moved to the “Textures” category
- Ability to view any kind of asset in a separate window ( Find related option in the menu or use the hotkey SPACEBAR )
- Ability to mass-rename files and external links on the Asset Files tab. ( menu Tools => Mass Rename Tool )
- User comments to files are now stored in the database (and also in the files themselves, that supports to store comments )
- Address box with advanced navigation capabilities like Windows Explorer
Updating from 2nd version
- Ability to Convert Descriptions and Tags for 3d Models from version 2 in batch mode ( find this option in the main 3ds Max menu “Project Manager v3”)
* For now, this feature can only be used to specify the color of folders and enable displaying files in subdirectories for several folders at once.
In the next versions, the functionality of working with several folders will be extended.
** materials also supported
*** Use drag&drop for changing the order for items in the gallery