 Translate

Using Project Manager you can be sure that you have complete control over external links in your scenes.
Asset tracking features include support for XREF files and easy linking with external files.
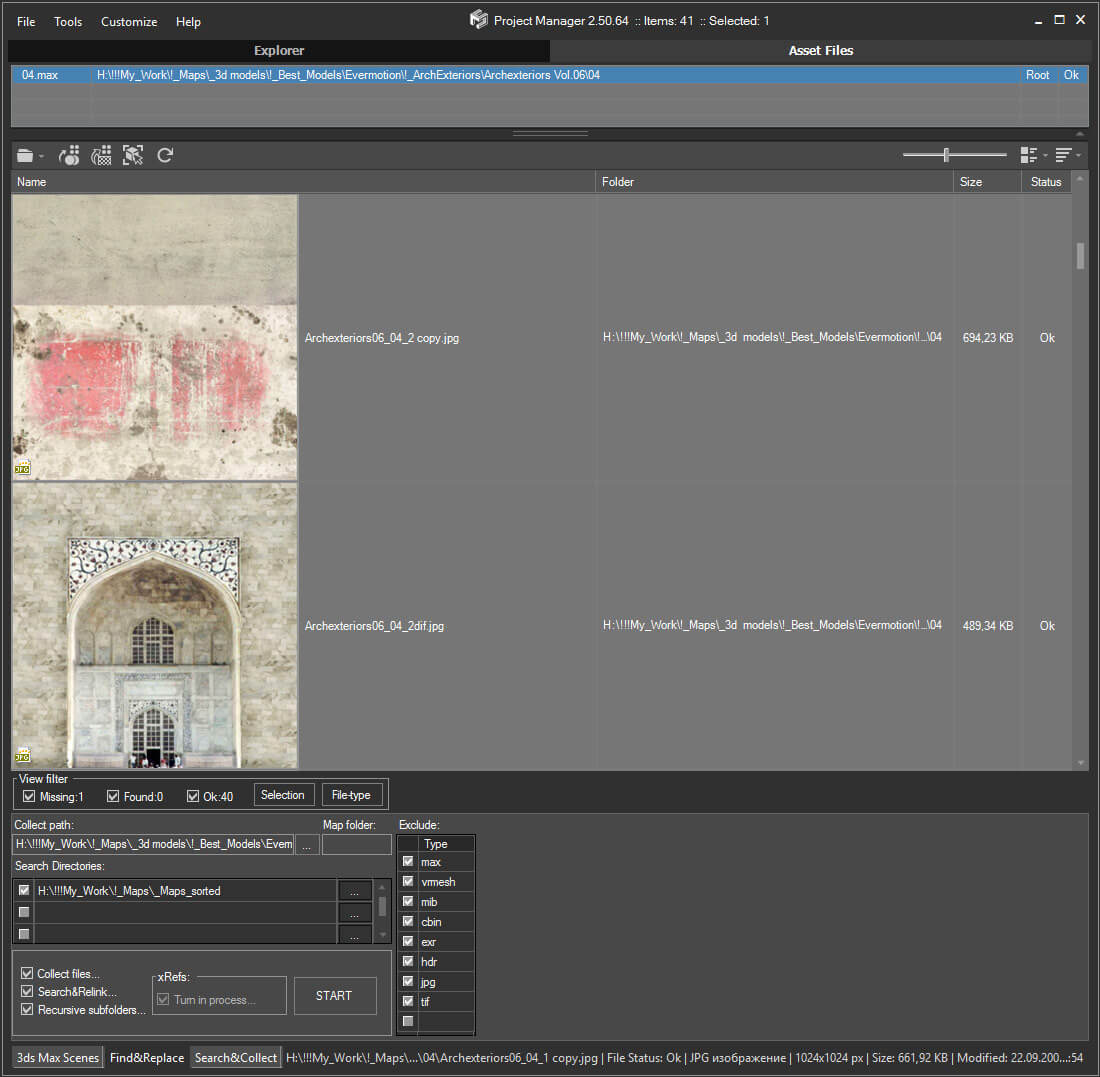
Using the Asset Files tab (and Batch Render&Relink), you can search for missing assets and relink external files.
Files may also be differentiated by type and/or renamed in accordance with masks.
Relink Asset Files without opening 3ds Max file
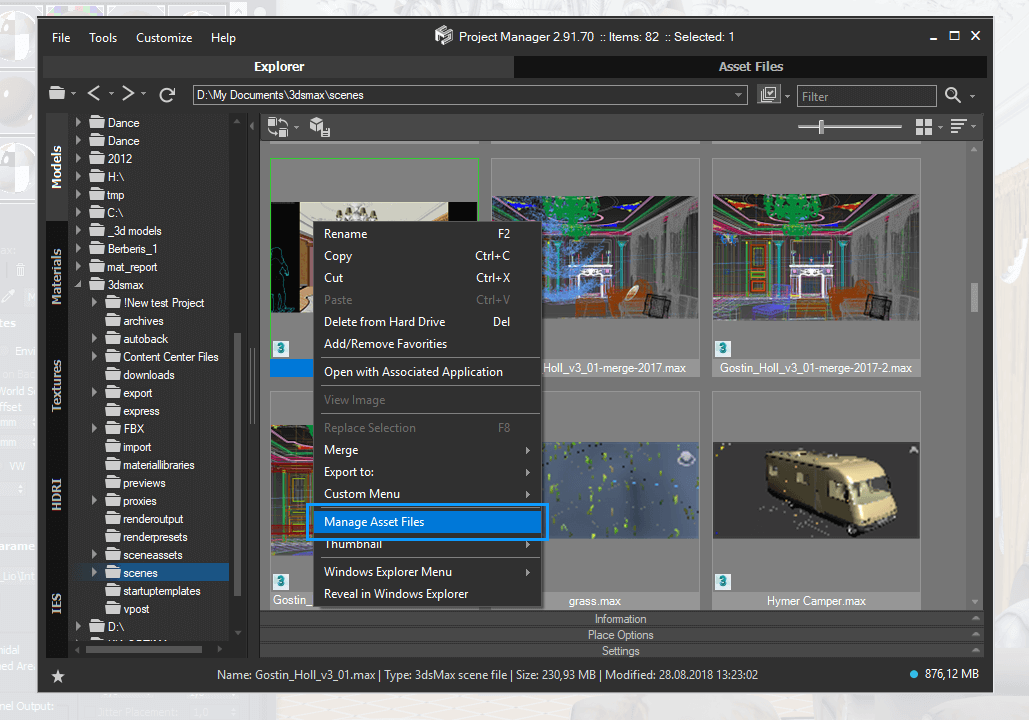
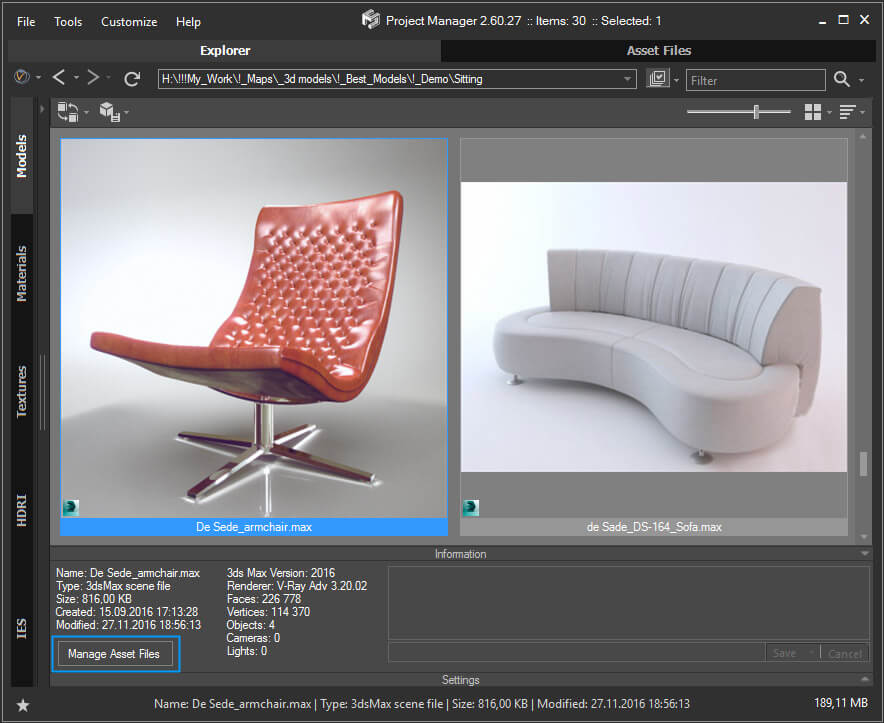
Open the tab “Models” and select 3Ds max file for relinking. Note that using the same method you can relink material library files to the tab “Materials”.
Choose the item “Manage Asset Files” from the right-click menu.
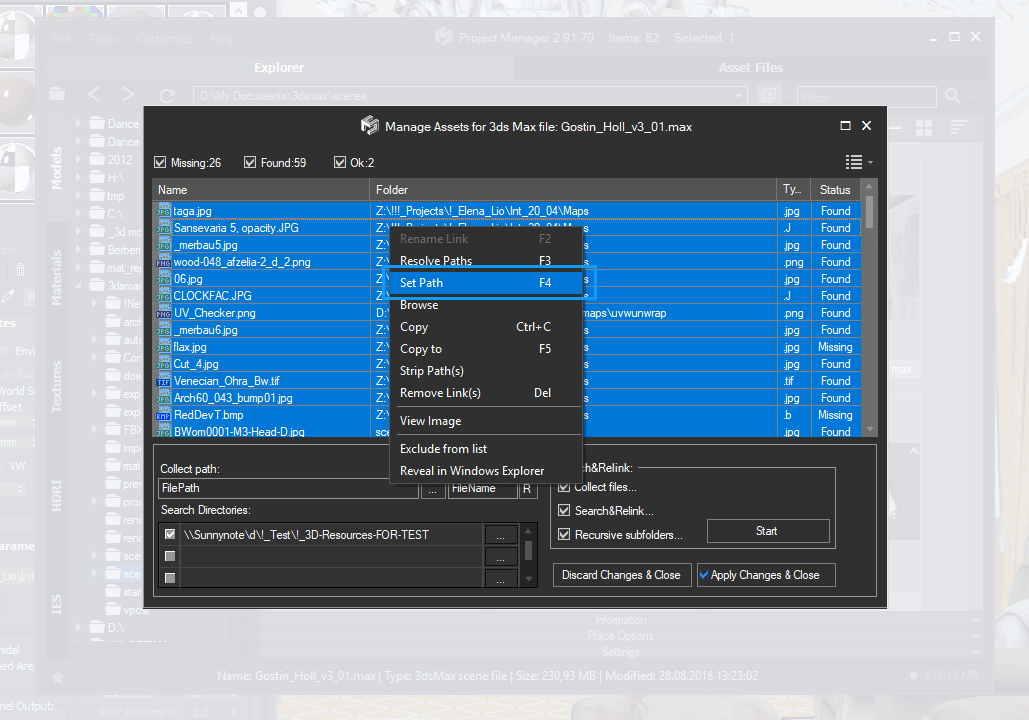
The “Manage asset files” dialog appears with a list of assets used in the scene.
Press CTRL+A to select all files in the list.
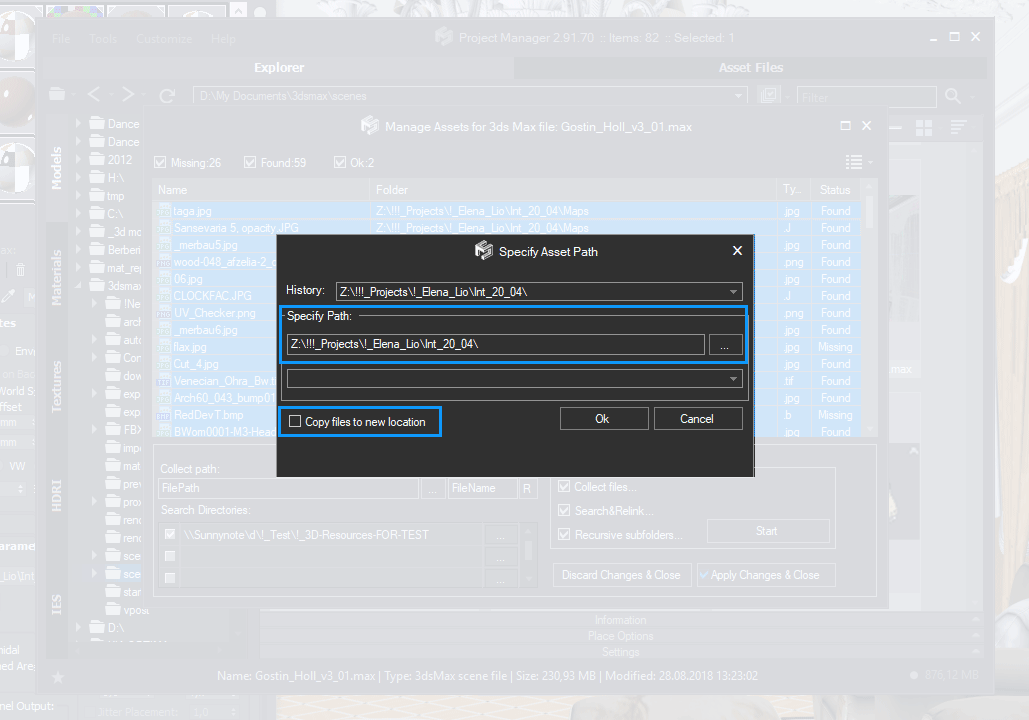
Press F4 or choose the item “Set Path” from the right-click menu.
Set a desired path for the selected items.
Turn on the option “Copy files to new location” to copy files a new location or keep this option off for relinking only.
Press the “OK” button.
Press the button “Apply Changes & Close”.
Note that this method is the fastest, but it doesn’t support some plugins. So some paths can be invisible from the “Manage Assets” dialog.
So after completing you can check if all scene’s assets have been relinked.
To do this, open this file and switch to “Asset Files” tab and check if all links have the desired path.
Read about the next method if you still need to relink some paths.
Relink Asset Files inside 3ds Max
Next methods are more classic for relinking the assets and more powerful, but they also require more time for processing assets.
Relink using “Set Path”
Open the scene and change tab to “Asset Files”.
Press “CTRL+A” to select all files in the list.
Press F4 or choose the item “Set Path” from the right-click menu.
Set the desired path for selected items. Turn on the option “Copy files to new location” for copy files to a new location or keep this option off for relinking only.
Press the “OK” button.
As you see this method works as described above but after pressing the “Ok” button the process of relinking starts immediately. Save your scene after finishing.
The process will be longer than in the first method, but more reliable.
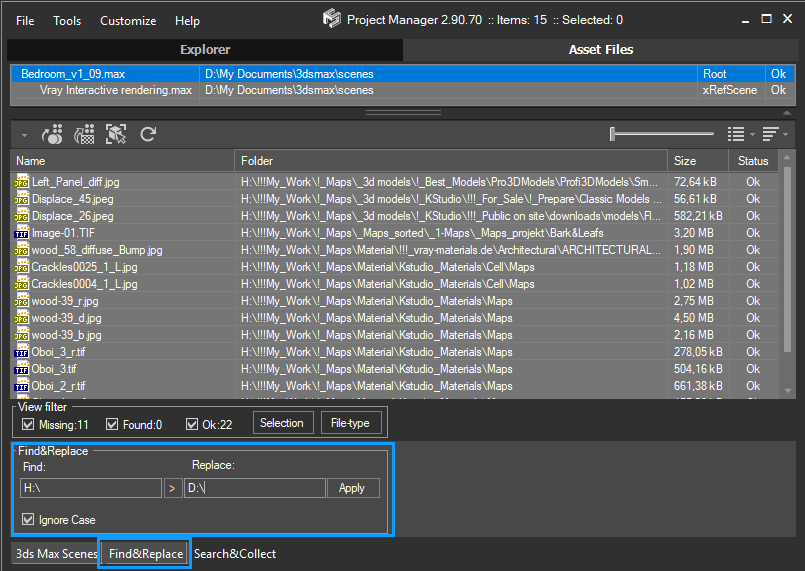
Relink using the “Find&Replace”
Using the “Find&Replace” option you can change some paths of asset files from one to another.
For example, you can change the path “C:\Projects\Maps” to “\\MyNetwork\Projects\Maps“
Type the text for replacing into the field “Find:” (“C:\“) and the text to change the part of the source path to the field “Replace:” (“MyNetwork“)
Press the “Apply” button.
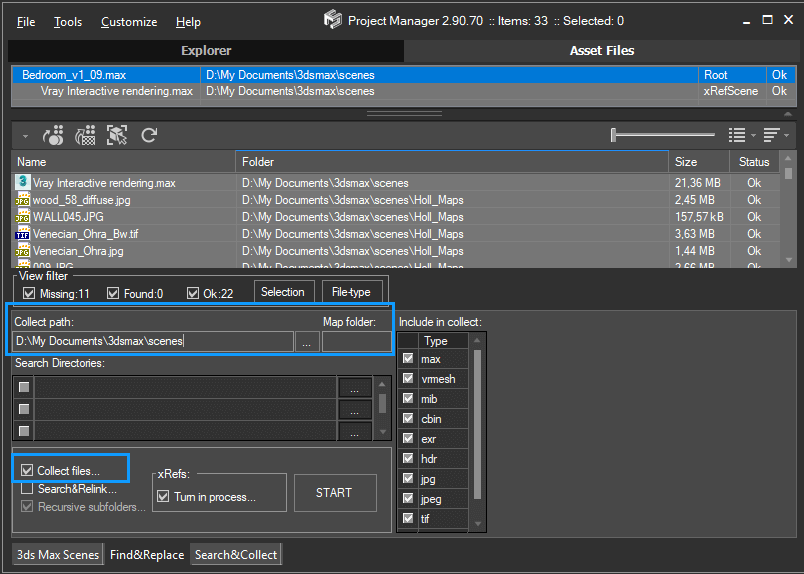
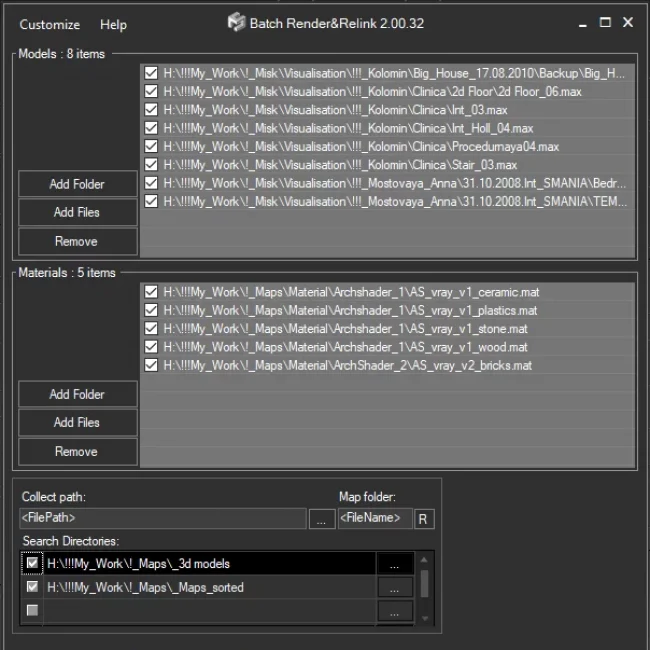
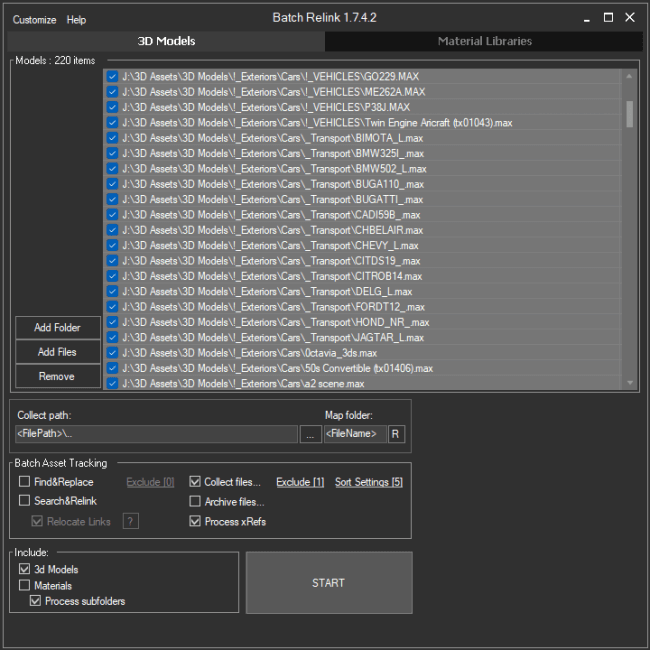
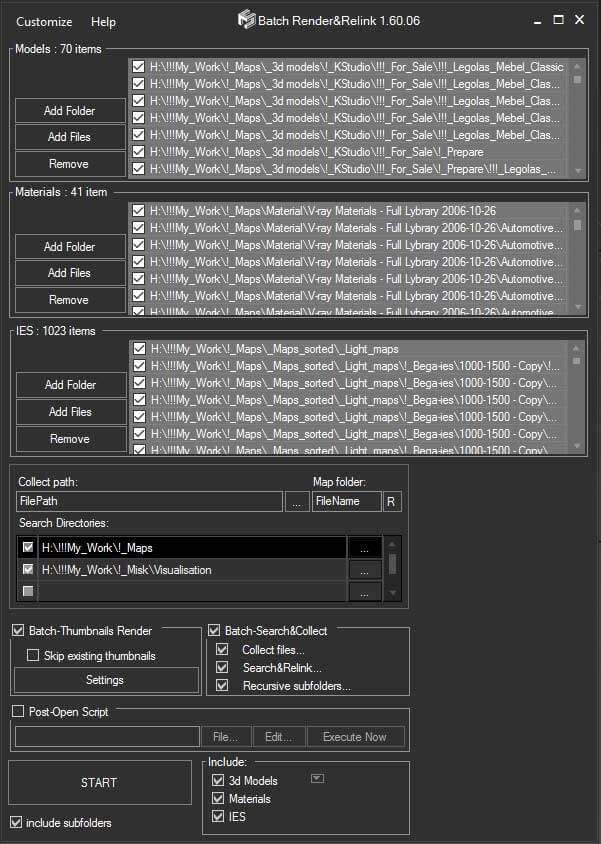
Relink using the “Search&Collect” panel
Using the “Search and Collect” panel, you will get the most options for manage external files.
Here you can exclude some file-types from collecting by turning off the checkbox on the right side of the panel.
Set the desired path for collecting assets.
Of course, you can specify several directories for searching for missing assets.
Include xRef to the process of collecting/searching.
Turn off the checkbox “Collect Files” if you want to only find missing files without collecting.
Press the “Start” button to start relinking the asset files.
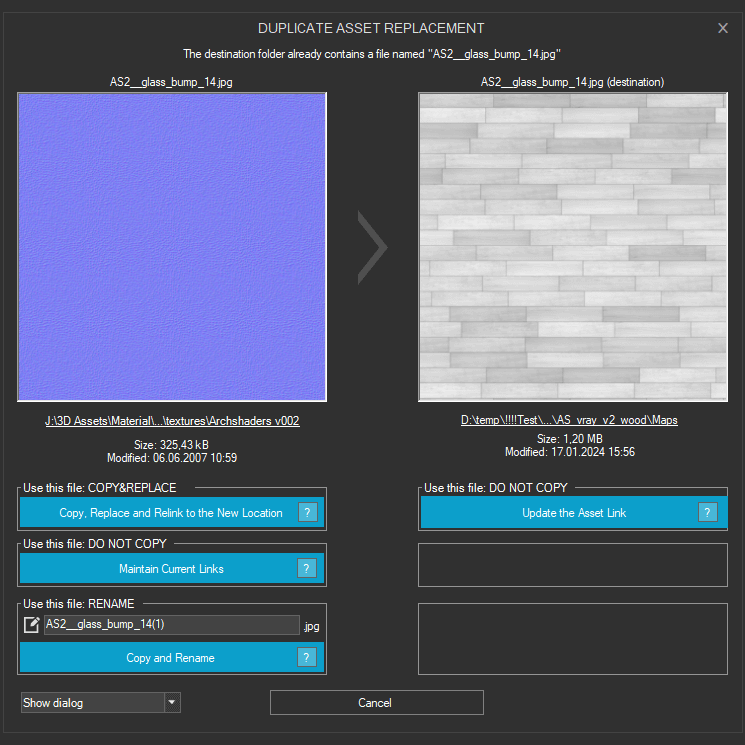
When copying files to one folder, some other files may have the same name.
In this case, the “DUPLICATE ASSET REPLACEMENT” dialog will be displayed, and you will be able to choose an action.
- Copy and Replace – a target file will be replaced with a new one.
- Keep old path – do not copy a file and do not change the link.
- Relink to destination – change only link.
- Also, you can choose the option to rename the file manually or in automatic mode.
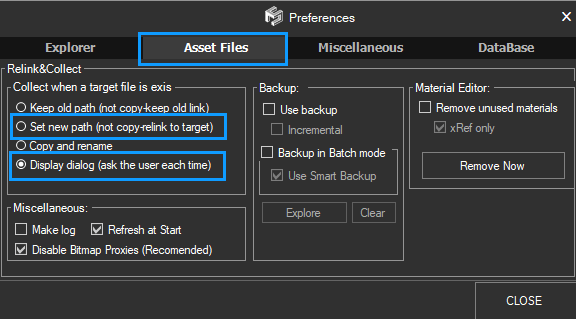
You can set the chosen action as default. If necessary, you can always change it in the “Preferences” dialog.
So Project Manager provides a well-rounded turnkey solution for most of your basic 3DS Max Asset Management needs.
Note that Project Manager supports the highest number of asset types of any plug-in. For example, Project Manager is the only plugin that can display and relink Vray Lens effects, even with missing bitmaps. In addition, scenes may be archived and easily sent to render services such as RebusFarm.
The Batch Render&Relink tool helps manage your asset files into the 3D model and material libraries in Batch Mode. BR&R can render thumbnails for 3D models, materials, and IES photometric files.
$60.00Add to Cart


Why the “Managed Asset File” in the model tab is grayed out?
This feature is active when one 3ds max file is selected and it contains external links