Advanced Asset Renamer lets renaming several files using different masks at once.
Besides, The tool allows the preview of a new filename immediately so that you can see the result before actually renaming your files and links.
This is a feature that users have been dreaming of for a while.
Now you can configure and rename selected asset files by mask in a couple of clicks using the method that is most convenient for you.
Defeat chaos and simplify setup VRay Bitmaps
Many of you must have had this situation when a scene with a model or a project looks something like this: a bunch of randomly named files, some of them containing numerals or Cyrillic letters.
Such filenames are neither descriptive nor elegant. But inconveniences aside, the names containing Cyrillics may actually cause problems during network rendering.
I’ve also started working in ACEScg space lately. In order for VRay to be able to recognize and set the correct color space of the texture in the VRay Bitmap node automatically, I need to add such suffixes as _srgb, _lin_srgb, and _raw to the names of my texture files. As you might guess, this isn’t done easily by hand.
ACES is the Academy Color Encoding System and developed by the Academy of Motion Picture Arts and Sciences. ACEScg is the version of the ACES encoding system for computer graphics, widely adopted in the industry. It has become the industry standard, because compared to sRGB, ACEScg works with a lot more color information.
Advanced Asset Renamer
Such tasks become very simple with the Advanced Asset Renamer tool which is a part of Project Manager.
You can find it in the Tools menu.
Advanced Asset Renamer allows you to rename selected files using different masks.
Note that you can immediately see the name that is to be assigned to your file.
Here I`d like to point out that if you run the tool in the Explorer tab, it will work with the files on your hard drive. In the Asset Files tab, you can work with links to textures, IES, and other assets used in the scene.
When the Rename on Hard Drive box is checked, the tool will rename both the links and the actual files on your hard drive.
Please note that renaming your files may affect the links to these files in other scenes. In order to avoid this problem, first, copy your files to the project folder and only then go on to rename them.
Whatever the case, I usually store all my project assets in the project folder. This helps to avoid possible issues with the renaming of the files that are already used in other projects.
Let me give you another demonstration of how you can quickly copy and relink all your textures in any scene.
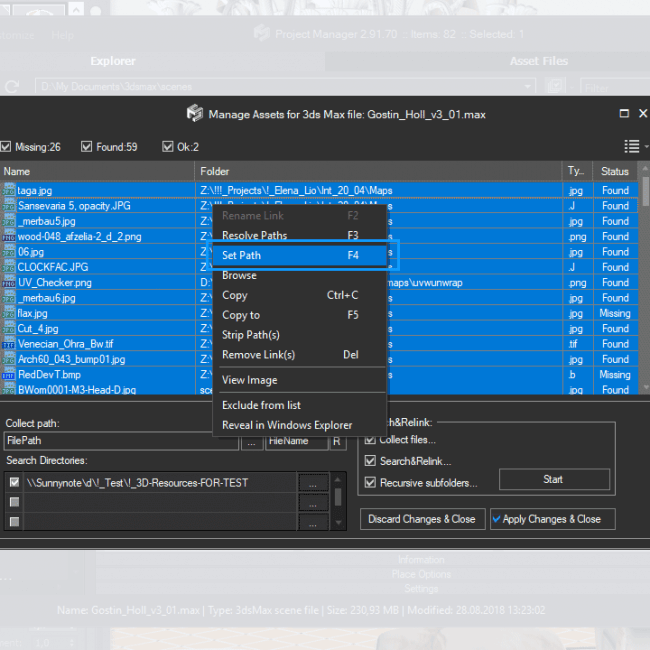
Open the Asset Files tab, enable the Collect Files option, and choose the path to where the project textures are stored. Name the folder intended for your scene assets and click Start.
All textures have been moved to the project folder and now we can rename them while not worrying that some links to these textures in other projects may get lost. Now let`s have a look at the core functions of the Advanced Asset Renamer tool.

Find&Replace tab
In the Find field, enter your search query, and in the Replace field, specify what to replace it with.
The Upper/lowercase parameter lets you control the letter case: you can leave it as it is or convert the file name to lowercase or uppercase.
You can also capitalize the first letter of the first word or the first letters of every word in the name.
Options tab
Regular Expression
If necessary, you can use regular expressions for renaming.
Regular expressions allow setting complex patterns for search and replace operations. You can find an overview of regular expressions on Wikipedia.
The tool shows the name to be assigned to your file then and there so that you can see the result before actually renaming your files and links. Which is rather convenient. Regular expressions are a separate subject to study.
Rename on Hard Drive
This option allows renaming not only the links but the actual files on the hard drive. The Ignore Extensions option is very useful in the case when changing filenames can mess up file extensions.
Let`s take the texture file “jpg wood_92_reflect.jpg” as an example. Deleting the “jpg” part of the name removes the extension of the file.
Activating the Ignore Extensions option allows you to change only the name of the file without altering its extension.
The Ignore Paths option is available only from the Asset Files tab and only when the Rename on Hard Drive option is off.
File Mask tab
Here we can choose different combinations for renaming scene files.
The default option is the standard [P][N][E] mask.
[P] stands for Path, [N] for Name, and [E] for Extension.
[С], or Counter, adds a counter to the file name. You can set the start value and the number of digits of the counter.
What else gives Project Manager and the Advanced Asset Renamer tool such an undeniable advantage?
We can choose specific files and links to be renamed. Let`s return to the subject of ACEScg space.
Like the sRGB space, ACEScg has certain rules: texture maps for diffuse, reflection, refraction, and some other slots should be gamma-corrected when loaded, while bump, displacement, roughness, and so on – should be loaded in linear space.
Thus, for example, you need to add the _lin_srgb suffix to the normal maps. While diffuse and reflect maps should be designated with the _srgb suffix. As to other textures linked to the scene, here is how you can figure out what suffix to use: choose your texture and use the Select Objects option to choose the object this texture belongs to.
In the Materials tab, open the shader. Here you can see the slot your texture is plugged into and now you can rename it using the correct suffix. In this case, the textures are plugged into the Diffuse slot.
So we need to add the _srgb suffix to these textures.
Such a simple tool, isn’t it? And yet, how greatly you can benefit from it!
Take care and fast renderings to you all!
$60.00Add to Cart

Paul Ushakov
3d rendering services for interior designers.
More than fifteen years of experience.
 Translate


