Tagged: Project Manager, Project Manager - Update History, Project Manager version 3, Update History
- May 7, 2024 at 19:59 #41376
- Do not copy the duplicate, and leave the link to its current location
- Relink the file to a new path
- Replace the existing file and relink to the new path
- Copy the asset, rename, and relink using a new path and name.
This option allows keeping both files - Adds support to 3Ds Max 2025
- Adds support to search/relink/collect/archive the content of IFL files
- Adds support to search/relink/collect/archive the content of Vrmat files
- Adds support to archives larger than 4GB [Archive Asset Files]
- Speed improvements for navigation Asset and File Management:
- Enhanced File ReLocate Capability
- Adds Ability to Sort Assets by Asset Type/Extension
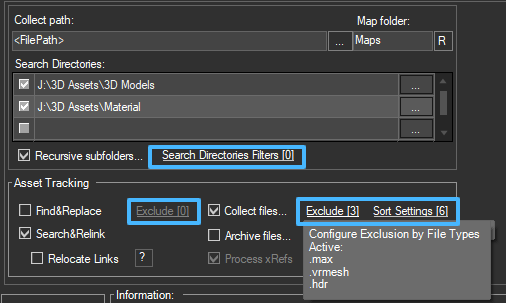
- Adds Ability to Include/Exclude Files from Collecting by Extension
- Adds Ability to Include/Exclude Files from Renaming by Extension
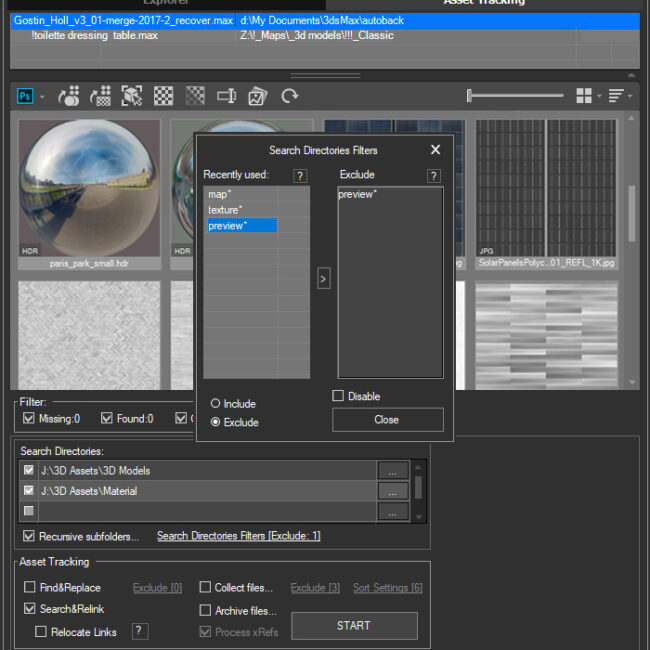
- Adds Ability to Include/Exclude Directories from Searching by mask
- "Duplicate Asset Replacement" Dialog UI Improvements
- Stores the sorting order for assets on the Explorer tab
- Adds an ability to disable auto-relink missing assets on merging models and materials (by default auto-relink is disabled)
- Fixes some bugs with renaming assets/directories on using in the TEAM-MODE
- Fixes a bug when collecting maps for several materials libraries [Batch Render&Relink] Rendering and Thumbnails:
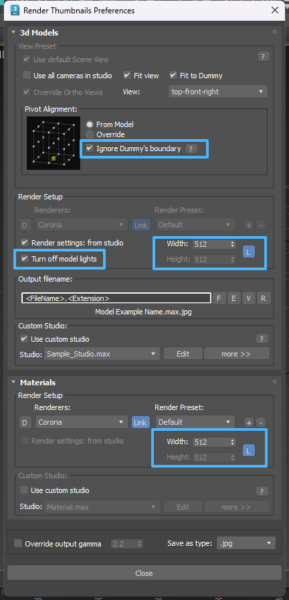
- Adds an ability to set different width/height for rendering preview thumbnails for models and materials
- Adds an ability to turn off/on lights from model scenes on rendering preview thumbnails
- Drops support to rendering preview for IES files (interactive rendering already supports IES)
- New option to render preview settings - Ignore Fit To Dummy: prioritize the pivot point of the model over its alignment within the Dummy boundary Material and Model Handling:
- "Duplicate Asset Replacement" Dialog for duplicated assets on storing models/materials to the library
- Copy content of IFL files on storing models/materials to the library with assets
- Adds an ability to use the Mass-Rename tool from the Manage Assets dialog for individual 3ds Max files and material libraries Interface and Usability Improvements:
- Some Interface Improvements and Changes
- Changes the behavior of Categories list on the status bar
- Fixes an issue with sorting items by Size and Date in the Categories and Search results
- Show more accurate information about missing files in the status bar
- Introduces importing capability from the DesignConnected database [Preferences/Database/Import Database] Bug Fixes and Minor Adjustments:
- Fixes some minor issues with merging models
- Fixes some issues with reusing merged proxy and models
- Fixes an issue with creating PBR materials with Arnold renderer
- Fixes an issue pausing Corona interactive render on merging models or materials
- Fixes a bug with deleting assets
- Fixes a bug with converting a scene to VRSCENE
- Fixes an issue with converting 16-bit TIF to JPG
- Fixes some minor issues with searching assets
- Fixes a bug with deleting files
- Fixes an issue with preview RPC, BVH, and BIP files
- Fixes an issue with assigning a preview for materials using the Auto-Assign preview tool
- Fixes some issues with the item's Gallery - add/remove/update preview
- Fixes an issue with assigning preview for materials with some options using the Auto-Assign preview tool
- Fixes some issues with working with the docked Slate Material Editor in 3ds Max 2024/2025
- Fixes some minor issues with interactive rendering of some static and animated FBX files
- Fixes a bug with copying databases from MySQL to SQLite and back
- Fixes the issues with the tool "Convert Comments&Tags from 2nd version"
This update of Project Manager primarily enhances the management and integration of external links for 3D models and materials.
These enhancements include comprehensive support for IFL files, advanced features for sorting assets during collection, the capability to exclude certain types of files from collection processes selectively, and expanded support for handling archives larger than 4 GB.
Furthermore, we’ve focused on streamlining workflows and improving efficiency, ensuring our users can manage and navigate their assets more effectively.
Merging/Saving 3D Models & Materials
From now on, when working with 3D assets, models or materials, relinking of IFL and Vrmat files is also supported.
It also supports the updated “DUPLICATE ASSET REPLACEMENT” dialog.
If you save a 3d model or material to the library containing different files with duplicate names, you will be prompted to choose how to handle duplicates.
The updated “DUPLICATE ASSET REPLACEMENT” dialogue will help you with this.Asset Tracking
IFL files support
Project Manager now fully supports IFL files, enabling the search and copying of raster files specified in .ifl files.
Whether you’re adding a model/material to a scene or saving an asset from a scene to a library, IFL files will now be processed including links to the bitmaps used in the IFL files.
Of course, IFLs are also supported when working on the scene, on the “Asset Tracking” tab, and when using the “Batch Render&Relink” utility when you search for missing assets or collect maps.
An IFL (Image File List) file constructs an animation by listing single-frame bitmap files for each rendered frame. Assigning an IFL file as a bitmap lets rendering step through each specified frame, creating an animated map.Sort Assets by Type/Extension
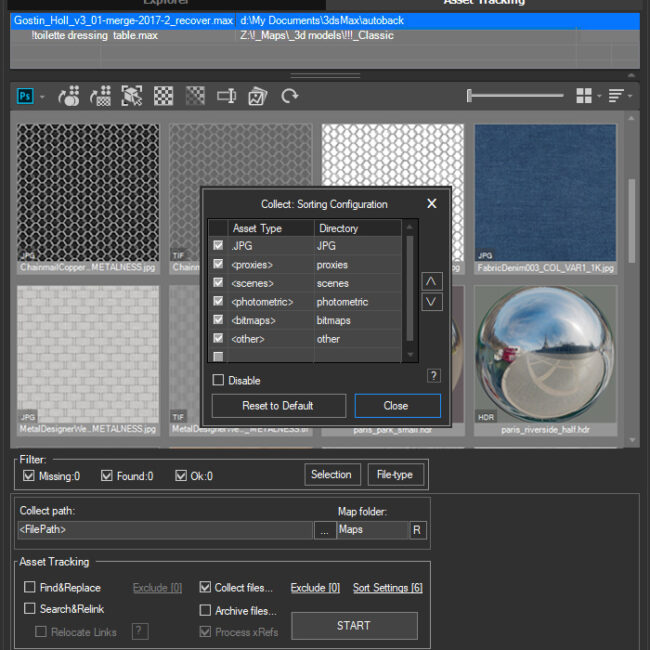
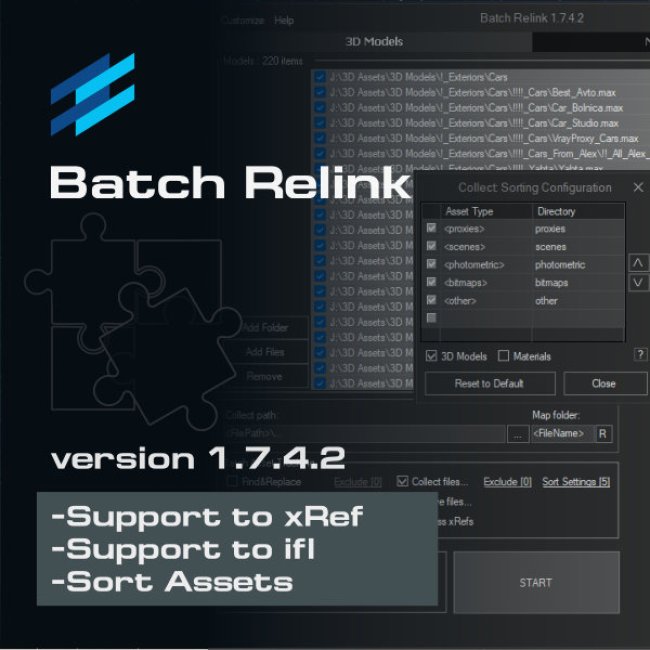
The plugin now offers the option to sort assets during collection, aiding in the better organization of assets.
This feature allows for sorting assets by types, such as placing proxies and textures in separate folders.
Users can also choose how to sort assets by extension, for instance, separating HDRI files from other bitmaps.Example steps to add the new rule for sorting HDR
Add File Type:
Double-click an empty field in the list to add the new file extension. Type .HDR to specify HDR image files.
Set the Destination Directory:
Specify the target directory where the HDR files should be collected. For instance, enter bitmaps\hdr as the directory path. This tells the system to gather all HDR files into this folder.
Prioritize the Rule:
To ensure HDR files are sorted into the correct directory, adjust their priority in the list. Use the arrow buttons to move the .HDR rule to the top of the list. If not prioritized, HDR files may default to a more general directory, like bitmaps, if the rule for that directory is listed first.Exclude Files From Collecting
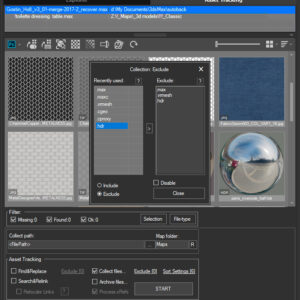
Excluding files by extension from the collection process adds flexibility, allowing users to leave large files, such as Proxy or HDRI, in their original locations.
Additionally, when gathering all assets into a single folder, users can exclude xRef files from being copied.
Assets can also be excluded based on their name, with support for the
wildcard “*” to broaden the exclusion criteria.
All previously utilized options are conveniently stored in a list on the left side, making it easier to reuse them.Pay attention that you can quickly assess which of the additional parameters are used
It’s important to note that during the archiving process, file exclusion settings are disregarded.
Include/Exclude Directories From Searching
The feature to exclude or include directories in the search by using a mask greatly streamlines the asset selection process, helping to prevent confusion between textures and previews.
For instance, if a texture’s name matches that of a model’s preview, the ability to exclude directories containing the words THUMBNAIL* or PREVIEW* from the search is beneficial.
Conversely, directories can be specifically included in the search by using masks like TEXTURE* or MAP*.
All previously used options are stored in the list on the left, so users can reuse saved filters at any time.Duplicate Asset Replacement
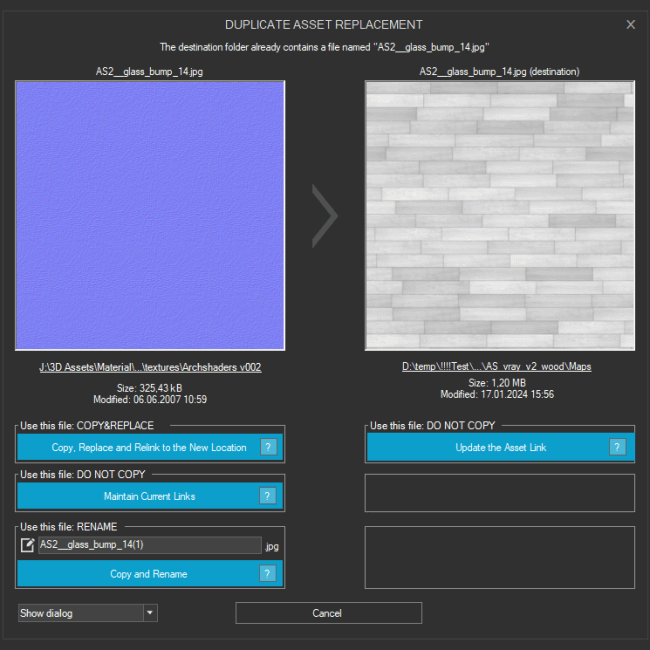
The improved interface of the dialog for resolving duplicate asset conflicts allows easy selection between several processing options, providing flexibility in resolving file name conflict issues.
Some assets may have the same names but different content.
To resolve the name conflict issue when copying, we offer the Duplicate Asset Replacement dialog. This dialog will show previews of duplicates and information about them to facilitate the choice of what to do with the duplicate.
The following options are available:The new version offers an improved interface for this dialog and a new feature – you can specify which option you wish to apply to the entire session. This means that the selected option will not become default, but your choice will be applied to all duplicates during this asset collection session.
This dialog is also used when saving models/materials from the scene to the library along with the used texturesRelocate Capability
The relocate feature enhances asset management by enabling the relinking of assets to a new folder, which is particularly useful for library reorganization or setting up different rendering options.
While the default search targets assets marked as “missing,” there are scenarios where it’s beneficial to relink assets to a different folder.
This may be necessary, for example, for library reorganization or when creating multiple rendering variations with different textures stored in various directories.To utilize this functionality, activate the “Relocate Links” option and define the new destination for the scene assets or material libraries by adding a folder to the list. It’s possible to add multiple folders to this list and change a priority for relocation based on the order of the folders– the higher the folder, the higher its priority, and the search will primarily take place in this folder.

Relocate Links

Reorder Search directories with drag&drop
Adjusting the order of these directories is straightforward; simply drag and drop a directory within the list to change its position. If you wish to exclude a folder from the search, just remove it from the list or uncheck the box next to it.
TIP: For efficient asset management, consider combining several batch processing features. For instance, you can activate the search, relocate, and collect assets options simultaneously for a streamlined workflow.
Rendering Thumbnails
Different width/height for rendering thumbnails
While the primary aim of generating previews is utilitarian, many users employ the preview rendering utility to also create high-quality visual representations for their models and materials.
Traditionally, a square has been the go-to, universally fitting size for 3D asset thumbnails. However, creativity thrives on flexibility, which is why we’ve introduced the option to customize the proportions of your preview renderings to suit your unique specifications. This allows for a broader range of thumbnail dimensions, catering to the diverse aesthetic preferences and requirements of our users’ projects.Turn off/on Model Scene Lights
Models like lamp fixtures often come with their own light sources, which can complicate the rendering process when dealing with numerous models, each with varied render settings, materials, and sizes.
To achieve more consistent and predictable outcomes, by default, all lights within the scene are turned off, when rendering previews. But now customers can render previews with the scene’s lights turned on. This feature provides a clearer insight into how the model, such as a lamp with its light source activated, will actually appear, enabling a more accurate depiction in the rendered preview.Pivot’s setting with “Ignore Dummy’s boundary” option
This option will help render the preview for such models as, for example, a tree with roots.
Usually, the pivot of such models is located at ground level.
For a better understanding, take a look at the rendering examples with and without this option.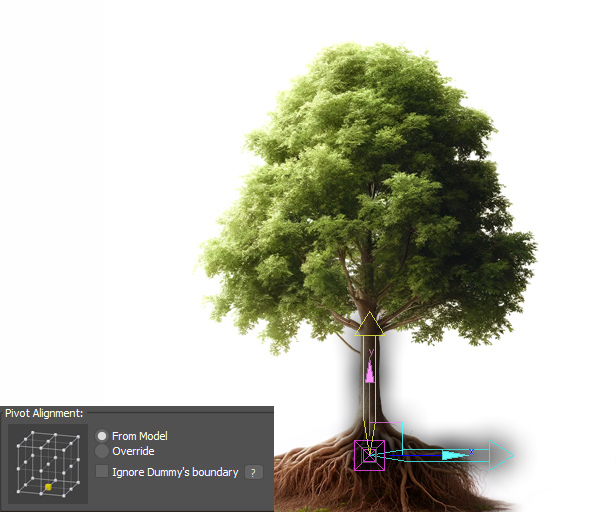
Turn OFF – Ignore Dummy’s boundary
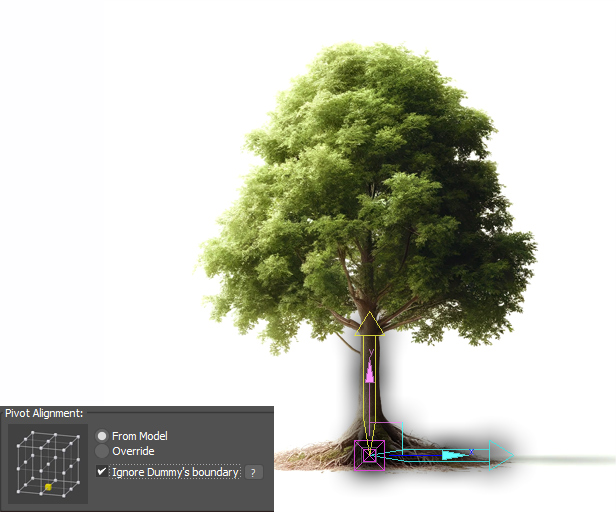
Turn ON – Ignore Dummy’s boundary
Below you can find the full list of changes and enhancements for this version
New Features for Project ManagerView Product
-
Core Updates and Support Enhancements:
$60.00Add to Cart
Read about the Latest Version
Related to "Project Manager version 3.35.25"
- May 13, 2024 at 17:05 #41712
 Oleksandr KramerModeratorPosts: 263Threads: 1247Joined: Aug 2009
This version is supported to import the database from Connecter
To do this – open Project Manager, go to the Customize menu, Preferences.
Switch to the Database tab and click on the button “Import Database” => “Import from Connecter”
Choose the Connecter database
Wait a few minutes for importing.

You must be logged in to reply to this topic.
 Translate
